Hobbies: Arduino Bluetooth Heater
May 2022
I currently live in a basement in Michigan, so I keep a small portable heater in my room. I keep the heater on the opposite side of the room from my bed because it's fairly loud while sleeping. At times, the room can get too hot and I have to get out of bed and turn the heater off.

This is really annoying, so I wanted to see if there was a way to use an arduino, a relay, and an HC-06 bluetooth module to fix the issue.
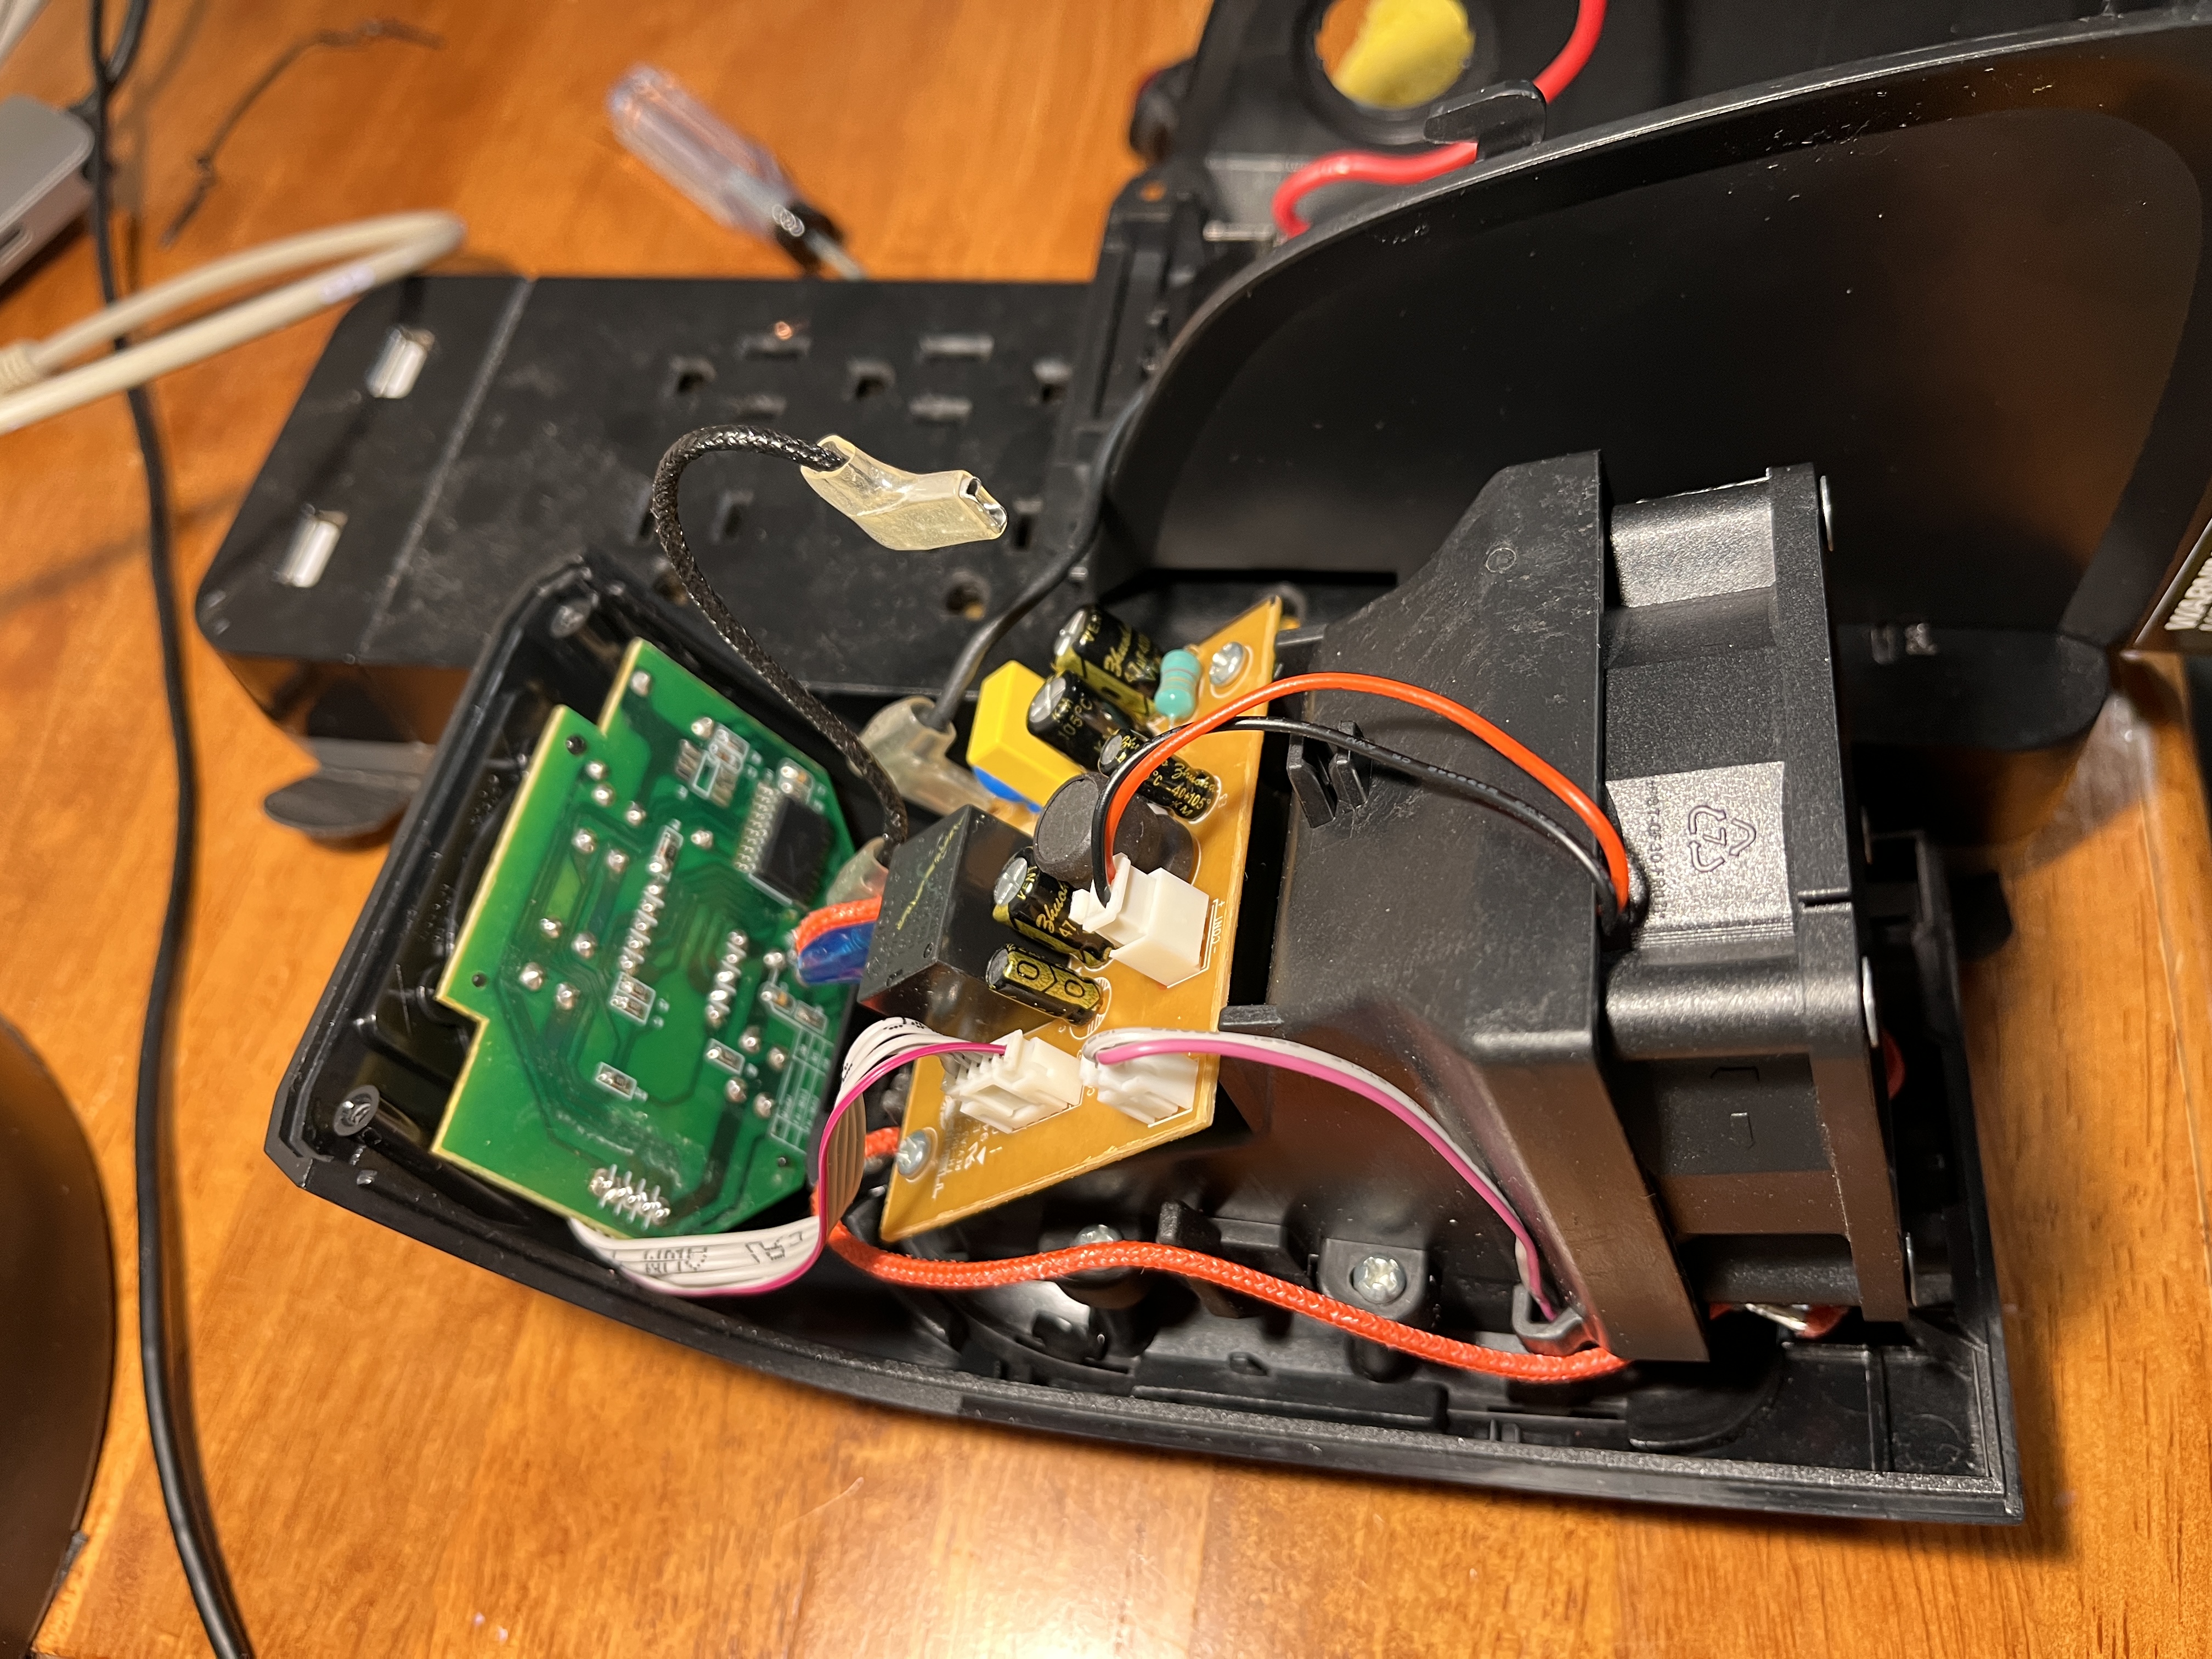
I started by taking apart the heater to see if it would be possible to add a relay in series with the power supply to the heater. There were two clip-on wires connected to the on-off switch, so I decided I would add the relay in series before the on-off switch. The relay comes with three terminals: normally open, common, and normally closed. I used the common and normally closed terminals so that when the relay wasn't being powered (ie if the arduino was off) I would still be able to operate heater like normal.
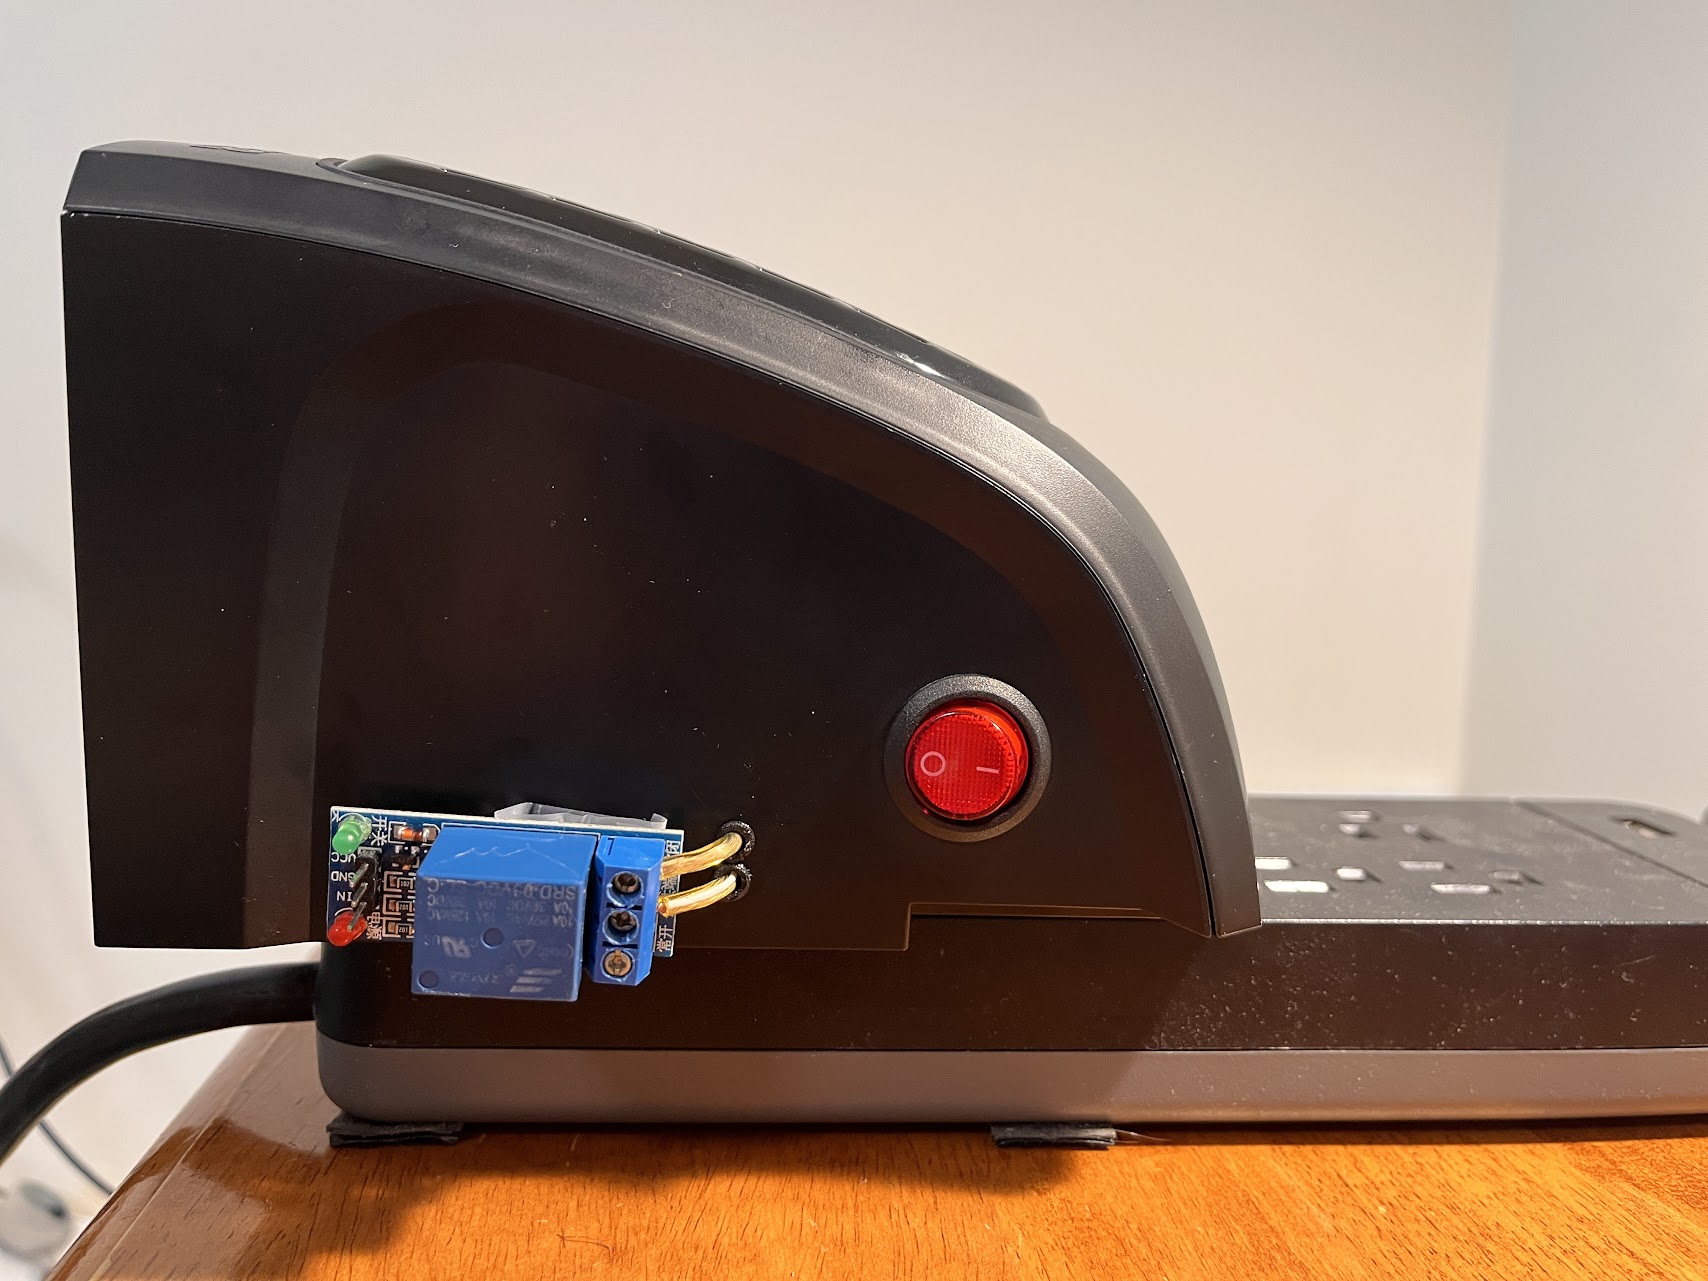
I then soldered the relay in-series, and poked two holes in the heater so that the relay could be mounted to the outside of the heater.
Next, I attempted to get the HC-06 working. The HC-06 is a bluetooth module that can receive messages from a bluetooth master device, such as a phone or computer, and relay those signals through a wired connection to a device like an arduino. In this case, my laptop is sending wireless serial communications through a UART to the HC-06, which then sends that communication directly to the Rx pin of the arduino. However, I'm using the SoftwareSerial arduino library, so arduino is using its processor, instead of UART, to control the serial interface. This is called bit-banging. If the arduino is programmed to send any data back to my computer, it will send that through its Tx pin to the HC-06, which wirelessly relays that same signal to my laptop. The HC-06 is different from an HC-05 in that the HC-06 can only act as a slave, meaning is can't connect to other bluetooth modules if it wanted to. The HC-05 can act as a slave and a master, meaning it could connect to an HC-06 or another HC-05 in slave mode.

I found helpful tutorials online that show how to connect an HC-06 to a computer (it still took me awhile). Several websites also gave example code for both the arduino IDE and the arduino processing IDE. The arduino processing IDE is needed to build the GUI to interface with the bluetooth module and to send data through the port on the laptop where the HC-06 is paired.
Connecting the HC-06 to the computer was tricky; I found the instructions here to be most helpful. A side note is that the LED on the HC-06 will not turn solid until there is a connection established on the COM port that the HC-06 is connected to, meaning you have to run the processing IDE file that runs the GUI and establishes the connection on the port that the HC-06 is paired to.
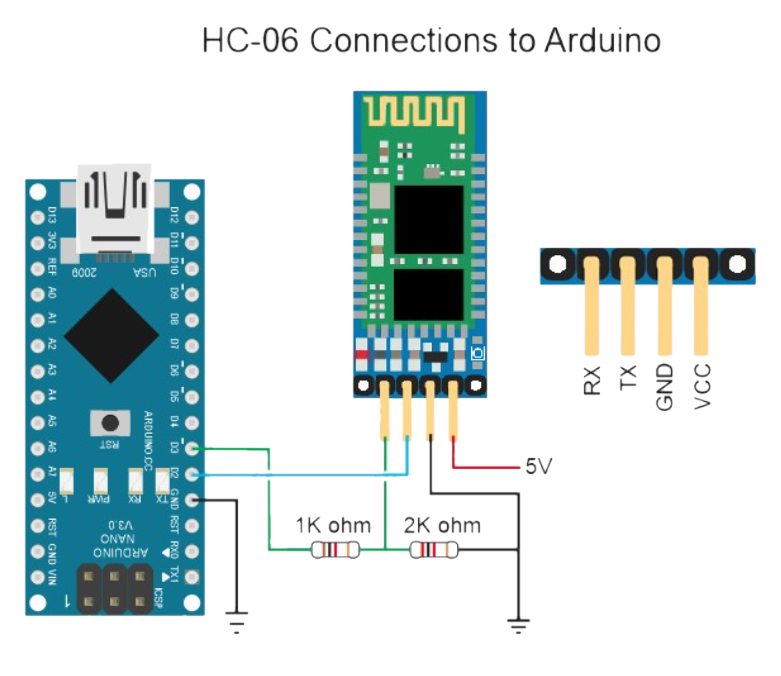
Before connecting the HC-06, I had to wire it to the arduino. Because the Rx pin of the HC-06 is rated for 3.3V, a voltage regulator has to be built to reduce the voltage of the digital arduino pins from 5V to 3.3V. A diagram of the voltage regulator is shown. Note that any resistance values will work, as long as the ratio between the two resistors stays at 2:1. I only had 220 ohm resistors at the time, so I used two 220 ohm resistors in series in place of the 2k ohm resistor shown in the diagram.
I then added the relay into the circuit, with the signal pin of the relay in parallel with pin 13 of the arduino.
Check out the videos here!
